How to connect WhatsMiner M30S+ to a mining pool?
How to Connect WhatsMiner M30S+ to a Mining Pool?
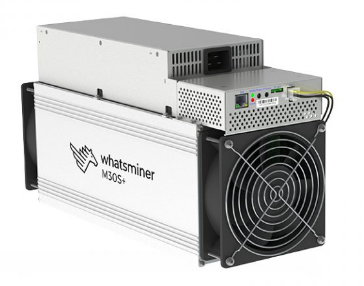
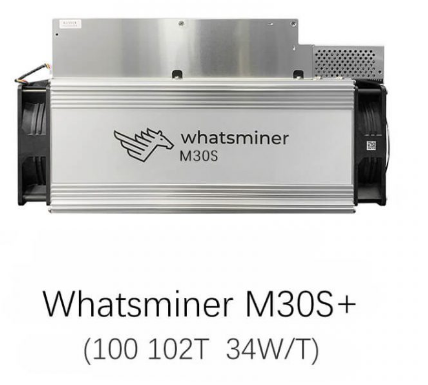
Cryptocurrency mining has evolved into a highly competitive and technical endeavor, requiring both powerful hardware and efficient operational strategies. Among the top-tier mining equipment available today, the WhatsMiner M30S+ stands out as a high-performance ASIC miner designed specifically for Bitcoin mining. With its impressive hashrate of 100 TH/s and energy-efficient design, the M30S+ is a popular choice for both individual miners and large-scale operations. However, to maximize its potential, it’s essential to connect it to a reliable mining pool. This guide will walk you through the process of setting up and connecting your WhatsMiner M30S+ to a mining pool, ensuring you can start mining Bitcoin efficiently.
Understanding the WhatsMiner M30S+
Before diving into the setup process, let’s briefly review the key features of the WhatsMiner M30S+:
- Hashrate: 100 TH/s (±5%)
- Power Consumption: 3400W (±10%)
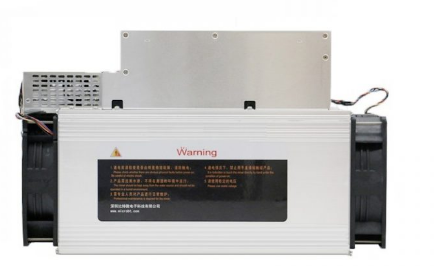
- Cooling System: Dual-fan design with optimized airflow
- Operating Temperature: -5°C to 40°C
- Connectivity: Ethernet interface
- Dimensions: 425mm x 155mm x 225mm, 11.1kg
These specifications make the M30S+ a powerhouse for Bitcoin mining, capable of delivering consistent performance under demanding conditions. However, to fully leverage its capabilities, joining a mining pool is crucial. Mining pools allow miners to combine their computational power, increasing the chances of solving blocks and earning rewards more consistently.
Step 1: Prepare Your Mining Setup
1.1 Unbox and Inspect Your WhatsMiner M30S+
When you receive your M30S+, carefully unbox it and inspect for any visible damage during transit. Ensure all components, including the power supply unit (PSU) and Ethernet cable, are included and in good condition.
1.2 Set Up the Hardware
Place the miner in a well-ventilated area with adequate cooling. The dual-fan system is designed to maintain optimal temperatures, but proper airflow is essential for long-term performance. Connect the PSU to the miner and plug it into a reliable power source. Use the provided Ethernet cable to connect the miner to your router or network switch.
1.3 Verify Power and Network Connections
Turn on the miner and check the LED indicators to confirm it’s receiving power. Ensure the Ethernet connection is active and the miner is connected to your local network.
Step 2: Access the WhatsMiner M30S+ Interface
2.1 Find the Miner’s IP Address
To configure the miner, you’ll need to access its web interface. First, identify the miner’s IP address. You can do this by checking your router’s connected devices list or using a network scanning tool like Angry IP Scanner.
2.2 Log in to the Web Interface
Open a web browser and enter the miner’s IP address in the address bar. You’ll be prompted to log in. The default username is root, and the password is also root. Once logged in, you’ll see the miner’s dashboard, which provides information about its status, hashrate, and temperature.
Step 3: Choose a Mining Pool
Selecting the right mining pool is critical for maximizing your earnings. Consider the following factors when choosing a pool:
- Pool Size: Larger pools offer more frequent payouts but smaller shares per block, while smaller pools may have higher variance but larger individual rewards.
- Fee Structure: Most pools charge a fee (typically 1-2%) for their services. Compare fees to find a cost-effective option.
- Payout Threshold: Check the minimum payout amount and frequency to ensure it aligns with your goals.
- Reputation: Research the pool’s reliability, transparency, and user reviews to avoid scams or poor service.
Some popular Bitcoin mining pools include F2Pool, Antpool, Slush Pool, and ViaBTC. Once you’ve selected a pool, create an account and obtain the necessary pool information, including the Stratum URL and your worker credentials.
Step 4: Configure the Mining Pool Settings
4.1 Navigate to the Mining Pool Configuration
In the miner’s web interface, locate the section for pool configuration. This is usually found under the “Miner Configuration” or “Pool Settings” tab.
4.2 Enter Pool Details
Enter the Stratum URL provided by the mining pool. For example, if you’re using F2Pool, the URL might look like this: stratum+tcp://btc.f2pool.com:3333
Next, enter your worker credentials. These typically include your wallet address or a custom worker name assigned by the pool. For example: WalletAddress.WorkerName
4.3 Save and Apply Changes
After entering the pool details, save the settings and apply them. The miner will restart and begin connecting to the specified pool.
Step 5: Monitor and Optimize Performance
5.1 Check Pool Connection
Once the miner restarts, monitor the dashboard to confirm it’s successfully connected to the pool. You should see the hashrate, accepted shares, and other relevant metrics displayed.
5.2 Verify Pool Dashboard
Log in to your mining pool account and check the pool’s dashboard. You should see your worker listed and the hashrate being contributed. This confirms that your miner is actively participating in the pool.
5.3 Optimize Settings
Experiment with different pool configurations or overclocking settings to maximize performance. However, be cautious not to push the miner beyond its limits, as this could lead to overheating or hardware failure.
Advantages of Using the WhatsMiner M30S+ in a Mining Pool
1. Consistent Earnings
Joining a mining pool ensures more predictable and regular payouts compared to solo mining, which relies solely on your miner’s computational power.
2. Enhanced Efficiency
The M30S+’s 100 TH/s hashrate makes it a valuable contributor to any pool, increasing the collective chances of solving blocks efficiently.
3. Lower Variance
By pooling resources, miners reduce the volatility of earnings, making it easier to plan and manage operational costs.
4. Access to Supportive Communities
Many mining pools offer forums, guides, and support channels where members can share tips and troubleshoot issues, enhancing the overall mining experience.
Conclusion
Connecting your WhatsMiner M30S+ to a mining pool is a straightforward process that unlocks its full potential. By following this guide, you can set up your miner, join a reliable pool, and start earning Bitcoin rewards with confidence. The M30S+’s advanced features, such as its 100 TH/s hashrate and dual-fan cooling system, make it an excellent choice for both novice and experienced miners. Remember to monitor your miner’s performance regularly and stay informed about industry trends to optimize your mining operations. Happy mining!