How to assemble WhatsMiner M30S+ in a mining rig?
How to Assemble WhatsMiner M30S+ in a Mining Rig?
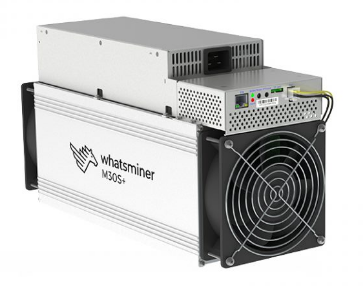
Cryptocurrency mining has evolved into a highly competitive and technical endeavor, requiring not only powerful hardware but also meticulous setup and optimization. Among the leading ASIC miners in the market, the WhatsMiner M30S+ stands out as a top-tier solution for Bitcoin mining. With its impressive hashrate of 100 TH/s and energy-efficient design, this miner is a favorite among both small-scale operators and large mining farms. However, to fully harness its potential, proper assembly and integration into a mining rig are crucial. This guide will walk you through the process of assembling the WhatsMiner M30S+ in a mining rig, ensuring optimal performance and longevity.
Understanding the WhatsMiner M30S+
Before diving into the assembly process, it’s essential to understand the key features and specifications of the WhatsMiner M30S+. This knowledge will help you make informed decisions during setup and ensure you’re leveraging the miner’s full capabilities.
Key Features
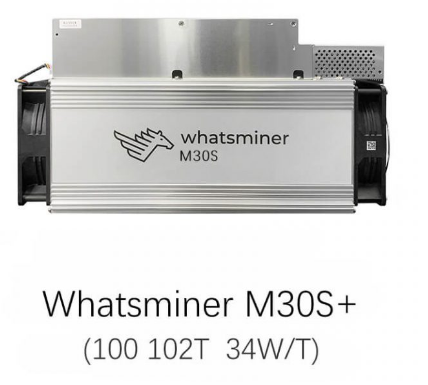
- Hashrate: 100 TH/s (±5%)
- Power Consumption: 3400W (±10%)
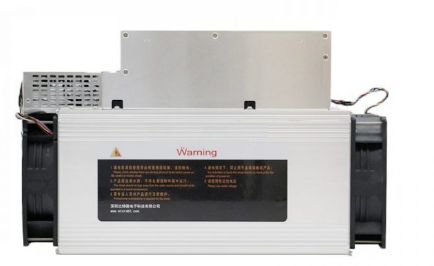
- Cooling System: Dual-fan design for efficient heat dissipation
- Noise Level: 75dB, suitable for various environments
- Dimensions: 425mm x 155mm x 225mm
- Weight: 11.1kg
- Operating Temperature: -5°C to 40°C
- Humidity Tolerance: 5% to 95%
The M30S+ is designed for durability and efficiency, making it an excellent choice for both beginners and experienced miners. Its compact size and robust construction allow for easy integration into existing mining setups, while its advanced cooling system ensures stable performance even under heavy workloads.
Pre-Assembly Preparation
1. Choose the Right Location
The first step in assembling your mining rig is selecting an appropriate location. The WhatsMiner M30S+ generates significant heat and noise, so consider the following factors:
- Ventilation: Ensure the area has adequate airflow to dissipate heat.
- Temperature Control: Maintain an ambient temperature between -5°C and 40°C.
- Noise Management: If operating in a residential area, consider soundproofing measures.
- Power Supply: Verify that the location has access to a stable 12V power supply capable of handling the miner’s 3400W consumption.
2. Gather Necessary Tools and Equipment
To assemble the M30S+ into your mining rig, you’ll need:
- A sturdy mining frame or rack
- Power supply units (PSUs) compatible with the miner’s requirements
- Ethernet cables for network connectivity
- Surge protectors and power distribution units (PDUs)
- Screwdrivers and other basic tools
3. Plan Your Setup
Before physically assembling the rig, plan the layout to optimize space and airflow. Position the miners in a way that allows for easy access to ports and ventilation. If using multiple M30S+ units, ensure they are spaced adequately to prevent overheating.
Step-by-Step Assembly Guide
Step 1: Mount the Miner on the Rack
- Place the WhatsMiner M30S+ on the mining frame or rack.
- Secure the miner using screws or brackets to prevent movement during operation.
- Ensure the miner is positioned horizontally to allow proper airflow through the dual-fan cooling system.
Step 2: Connect the Power Supply
- Verify that your PSU can handle the miner’s power requirements (3400W).
- Connect the PSU to the miner using the provided power cables.
- Plug the PSU into a surge protector or PDU to safeguard against power fluctuations.
Step 3: Set Up Network Connectivity
- Connect the miner to your network using an Ethernet cable.
- Ensure the network is stable and has low latency to maximize mining efficiency.
- Configure the miner’s IP address through your router’s interface for remote management.
Step 4: Configure the Miner
- Access the miner’s web interface by entering its IP address in a browser.
- Log in using the default credentials (usually “root” for both username and password).
- Configure the mining pool settings by entering the pool’s URL, port, and your wallet address.
- Save the settings and restart the miner to begin mining.
Step 5: Monitor and Optimize
- Use the miner’s interface or third-party software to monitor performance metrics such as hashrate, temperature, and power consumption.
- Adjust fan speeds or reposition the miner if temperatures exceed optimal levels.
- Regularly check for firmware updates to ensure the miner operates at peak efficiency.
Operational Tips for Maximizing Performance
1. Maintain Optimal Cooling
The dual-fan cooling system of the M30S+ is designed to handle high workloads, but additional cooling measures can further enhance performance. Consider installing external fans or air conditioning units in the mining facility to maintain a stable operating temperature.
2. Optimize Power Usage
While the M30S+ is energy-efficient, reducing power consumption can improve profitability. Use energy-efficient PSUs and consider renewable energy sources like solar or wind power to lower operational costs.
3. Regular Maintenance
Dust and debris can accumulate over time, affecting the miner’s performance. Clean the fans and vents regularly to ensure proper airflow. Additionally, inspect the power cables and connections for signs of wear or damage.
4. Leverage Remote Management
The M30S+ supports remote monitoring and management, allowing you to track performance and make adjustments from anywhere. Utilize this feature to minimize downtime and respond quickly to any issues.
Advantages of the WhatsMiner M30S+ in a Mining Rig
1. High Hashrate for Competitive Mining
With a hashrate of 100 TH/s, the M30S+ offers a significant advantage in the competitive Bitcoin mining landscape. Its processing power ensures you can mine more blocks and generate higher revenues.
2. Energy Efficiency
Despite its high performance, the M30S+ maintains a balance between power consumption and output. This efficiency translates to lower electricity costs and improved profitability.

3. Durability and Reliability
Built with industrial-grade components, the M30S+ is designed for 24/7 operation in demanding environments. Its robust construction minimizes the risk of hardware failures and ensures long-term reliability.
4. Easy Integration
The miner’s compact design and standard connectivity options make it easy to integrate into existing mining setups. Whether you’re running a small home rig or a large-scale farm, the M30S+ fits seamlessly into your operation.
5. Comprehensive Warranty and Support
WhatsMiner offers a 180-day warranty on the M30S+, providing peace of mind and protection for your investment. Additionally, the brand’s reputation for quality and customer support ensures you’ll have access to resources and assistance when needed.
Conclusion
Assembling the WhatsMiner M30S+ into a mining rig is a straightforward process that, when done correctly, can significantly enhance your Bitcoin mining operations. By understanding the miner’s features, preparing your setup, and following the step-by-step assembly guide, you can ensure optimal performance and longevity. The M30S+’s combination of high hashrate, energy efficiency, and durability makes it an excellent choice for miners looking to stay competitive in the ever-evolving cryptocurrency landscape. With proper maintenance and optimization, your M30S+ mining rig will be a valuable asset in your quest for mining success.