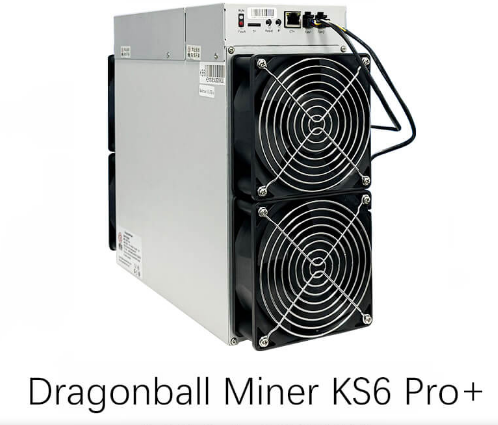
How to assemble a mining farm with Dragonball Miner KS6 Pro+ miners?
How to Assemble a Mining Farm with Dragonball Miner KS6 Pro+ Miners?
Cryptocurrency mining has evolved significantly over the years, and the need for high-performance, energy-efficient mining equipment has never been greater. For those looking to build or upgrade a mining farm, the Dragonball Miner KS6 Pro+ stands out as a top-tier solution. Designed specifically for kHeavyHash and KAS-Kaspa mining operations, this miner combines cutting-edge technology with practical features that make it ideal for professional mining setups. In this article, we’ll walk you through the process of assembling a mining farm with the Dragonball Miner KS6 Pro+, highlighting its advantages and providing actionable insights for optimal performance.
Why Choose the Dragonball Miner KS6 Pro+?
Before diving into the assembly process, it’s essential to understand why the Dragonball Miner KS6 Pro+ is a standout choice for mining farms:
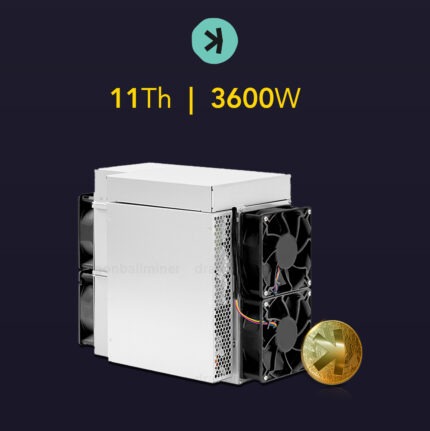
- Exceptional Hashrate: With an impressive 11 TH/s (with a potential variance of up to +5%), the KS6 Pro+ delivers superior computational power, ensuring maximum mining efficiency.
- Energy Efficiency: Boasting a power efficiency ratio of 0.308 J/G (±10%), this miner optimizes energy consumption, reducing operational costs significantly.
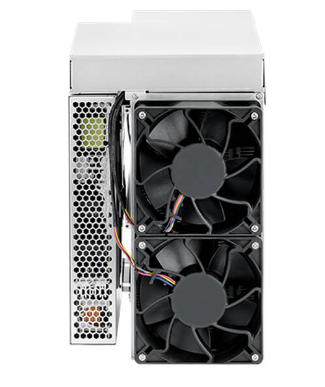
- Robust Thermal Management: The advanced thermal design ensures stable operation in temperatures ranging from 0°C to 40°C, making it adaptable to various environments.
- Compact and Durable: Measuring 360×185×290mm and weighing 14.5kg, the KS6 Pro+ is both space-efficient and built to last.
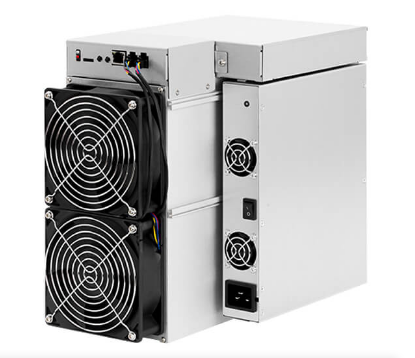
- Versatile Deployment: Its wide input voltage range (165-300V) and altitude tolerance (up to 2000 meters) make it suitable for global deployment.
These features make the Dragonball Miner KS6 Pro+ a reliable and cost-effective option for both new and experienced mining operators.
Step 1: Planning Your Mining Farm Setup
Assess Your Space and Power Requirements
When assembling a mining farm, the first step is to evaluate your available space and power infrastructure. The compact design of the KS6 Pro+ allows for efficient use of space, but you’ll still need to ensure proper ventilation and cooling to maintain optimal performance.
- Power Consumption: Each KS6 Pro+ consumes 3600W (±10%) at full load. Calculate your total power requirement based on the number of units you plan to deploy.
- Cooling Needs: Ensure adequate airflow and cooling systems to manage the heat generated by multiple miners. Consider using industrial fans or HVAC systems if necessary.
Network Infrastructure
The KS6 Pro+ uses RJ45 Ethernet connectivity with 10/100M compatibility. Plan your network setup to ensure stable and high-speed internet connectivity for all miners.
Step 2: Unboxing and Inspecting Your Miners
Upon receiving your Dragonball Miner KS6 Pro+ units, carefully inspect each one for any shipping damage. Ensure all components, including power cables and network cables, are included. The miner’s professional-grade build quality ensures durability, but it’s always wise to verify everything is in perfect condition before installation.
Step 3: Setting Up the Physical Layout
Rack Installation
For efficient space utilization, mount the KS6 Pro+ miners on sturdy mining racks. Ensure the racks are placed in a location with good airflow and minimal obstructions. Leave sufficient space between miners to prevent overheating.
Cable Management
Organize power and network cables neatly to avoid tangling and ensure easy access for maintenance. Label each miner for quick identification during troubleshooting or upgrades.
Step 4: Connecting Power and Network
Power Connection
The KS6 Pro+ supports an input voltage range of 165-300V, making it compatible with most power infrastructures. Use high-quality power cables and connectors to ensure stable power delivery. Consider using a dedicated circuit for each miner to prevent overloading.
Network Setup
Connect each miner to your network using Ethernet cables. Configure the miners with static IP addresses to simplify monitoring and management.
Step 5: Configuring the Miners
Initial Setup
Access the miner’s web interface via its IP address to configure mining pools, wallet addresses, and other settings. The KS6 Pro+ is compatible with popular mining software, making the setup process straightforward.
Optimizing Performance
Leverage the miner’s advanced power management system to fine-tune performance. Monitor hashrate and temperature regularly to ensure optimal operation.
Step 6: Implementing Monitoring and Maintenance
Monitoring Tools
Use monitoring software to track the performance of your KS6 Pro+ miners. Look for tools that provide real-time data on hashrate, temperature, and power consumption.
Regular Maintenance
Schedule routine checks to clean dust from fans and vents, inspect cables, and verify network connectivity. The 180-day warranty on the KS6 Pro+ provides added peace of mind, but proactive maintenance can extend the lifespan of your equipment.
Step 7: Scaling Your Mining Farm
As your mining operations grow, consider adding more KS6 Pro+ units to your farm. The miner’s compact design and versatile deployment capabilities make scaling up seamless. Ensure your power and cooling infrastructure can accommodate the additional load.
Advantages of Using Dragonball Miner KS6 Pro+ in Your Mining Farm
- High ROI: The combination of 11 TH/s hashrate and 0.308 J/G efficiency ensures a faster return on investment.
- Reliability: With a 180-day warranty and robust build quality, the KS6 Pro+ minimizes downtime and repair costs.
- Flexibility: Its wide voltage range and temperature tolerance make it adaptable to various mining environments.
- Easy Integration: The RJ45 Ethernet connectivity simplifies network setup and integration.
Real-World Applications
The Dragonball Miner KS6 Pro+ has been successfully deployed in diverse mining environments, from large-scale industrial farms to small home setups. Its superior hashrate and energy efficiency have made it a favorite among mining operators seeking to maximize profitability.
Case Study: Scalable Mining Farm in North America
A mining operator in North America deployed 50 KS6 Pro+ units in a warehouse setup. By leveraging the miner’s compact design and advanced thermal management, they achieved a stable hashrate of 550 TH/s while keeping operational costs low. The farm’s ROI was realized within 8 months, thanks to the miner’s efficiency and performance.
Conclusion
Assembling a mining farm with the Dragonball Miner KS6 Pro+ is a strategic move for anyone serious about cryptocurrency mining. Its premium performance, energy efficiency, and versatile deployment capabilities make it an ideal choice for both small and large-scale operations. By following the steps outlined in this guide, you can build a mining farm that delivers consistent results and maximizes your return on investment.
Whether you’re a seasoned mining operator or just starting, the Dragonball Miner KS6 Pro+ offers the tools you need to succeed in today’s competitive mining landscape. With proper planning, setup, and maintenance, your mining farm will be well-positioned to thrive in the ever-evolving world of cryptocurrency.