How to install Dragonball Miner KS6 Pro+ in a mining farm?
How to Install Dragonball Miner KS6 Pro+ in a Mining Farm?
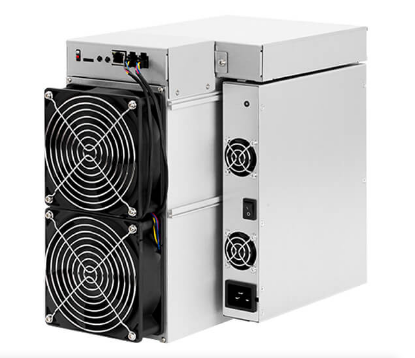
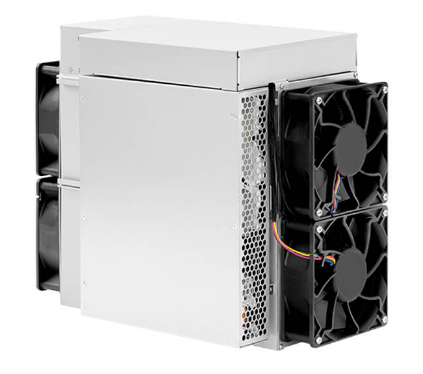
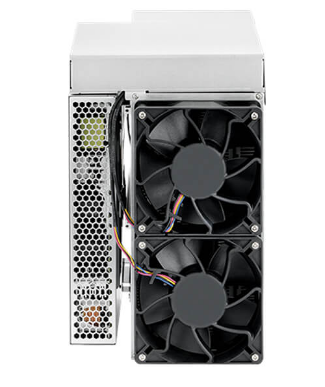
The Dragonball Miner KS6 Pro+ is a state-of-the-art cryptocurrency mining machine designed specifically for kHeavyHash and KAS-Kaspa mining operations. With its impressive 11 TH/s hashrate and industry-leading power efficiency of 0.308 J/G, the KS6 Pro+ is a powerhouse that can significantly enhance your mining farm’s productivity. However, to fully leverage its capabilities, proper installation and setup are crucial. This guide will walk you through the steps to install the Dragonball Miner KS6 Pro+ in your mining farm, ensuring optimal performance and longevity.
Understanding the Dragonball Miner KS6 Pro+
Before diving into the installation process, it’s essential to understand the key features and specifications of the KS6 Pro+ that make it a standout choice for professional mining operations:
- Hashrate and Efficiency: The KS6 Pro+ delivers an exceptional 11 TH/s with a potential variance of +5%, making it one of the most powerful miners in its class. Its power efficiency ratio of 0.308 J/G ensures that you maximize output while minimizing energy costs.
- Power Management: With a power consumption of 3600W (±10%) and a wide input voltage range of 165V to 300V, the KS6 Pro+ is adaptable to various power infrastructures worldwide.
- Thermal Design: The miner operates reliably in temperatures ranging from 0°C to 40°C, thanks to its advanced thermal management system.
- Compact Design: Measuring 360×185×290mm and weighing 14.5kg, the KS6 Pro+ is designed for space efficiency without compromising build quality.
- Versatility: It supports kHeavyHash and KAS-Kaspa algorithms, making it ideal for miners focusing on these cryptocurrencies.
These features make the KS6 Pro+ a valuable addition to any mining farm, but proper installation is key to unlocking its full potential.
Step 1: Preparing Your Mining Farm
Before installing the KS6 Pro+, ensure your mining farm is ready to accommodate this high-performance machine. Here’s what you need to consider:
Power Infrastructure
The KS6 Pro+ requires a stable power supply of 3600W with an input voltage range of 165V to 300V. Ensure your facility has adequate electrical capacity to handle this load. It’s recommended to use dedicated circuits for each miner to avoid overloading.

Cooling and Ventilation
Given the miner’s thermal output, proper cooling is essential. Install industrial-grade fans or exhaust systems to maintain an ambient temperature of 0°C to 40°C. Adequate airflow will prevent overheating and ensure consistent performance.
Space Allocation
Despite its compact design, the KS6 Pro+ requires sufficient space for installation and maintenance. Plan your mining farm layout to allow easy access to each unit for troubleshooting and upgrades.
Network Setup
The KS6 Pro+ relies on RJ45 Ethernet connectivity for network integration. Ensure your mining farm has a stable internet connection and sufficient network bandwidth to support multiple miners.
Step 2: Unboxing and Inspecting the KS6 Pro+
When you receive your KS6 Pro+, inspect the package for any signs of damage during transit. Carefully unbox the miner and verify that all components, including the power cord and Ethernet cable, are included. Check the miner for physical damage or defects before proceeding with installation.
Step 3: Installing the KS6 Pro+
Follow these steps to install the KS6 Pro+ in your mining farm:
Positioning the Miner
Place the KS6 Pro+ in its designated location within your mining farm. Ensure it’s placed on a stable, flat surface and that there’s enough clearance around the unit for proper airflow. Avoid stacking miners directly on top of each other to prevent heat buildup.
Connecting the Power Supply
Connect the power cord to the KS6 Pro+ and plug it into a dedicated power outlet. Ensure the voltage matches the miner’s specifications (165V to 300V). For added safety, use surge protectors to safeguard against power fluctuations.
Networking the Miner
Connect the Ethernet cable to the RJ45 port on the KS6 Pro+ and your network router or switch. Ensure the connection is secure and that the miner has access to the internet.
Step 4: Configuring the KS6 Pro+
Once the miner is physically installed, you’ll need to configure it for operation:
Accessing the Miner’s Interface
Using a computer connected to the same network, open a web browser and enter the miner’s IP address (found in your router’s connected devices list). Log in using the default credentials provided in the user manual.
Setting Up Mining Parameters
Configure the miner to mine your desired cryptocurrency (kHeavyHash or KAS-Kaspa). Enter your mining pool details, including the pool address, port, and worker credentials. Adjust settings such as fan speed and power mode to optimize performance based on your farm’s conditions.
Testing the Miner
Run the miner for a few hours to monitor its performance. Check the hashrate, temperature, and power consumption to ensure everything is operating within expected parameters.
Step 5: Monitoring and Maintenance
To maximize the lifespan and efficiency of your KS6 Pro+, implement a robust monitoring and maintenance routine:
Monitoring Tools
Use monitoring software to track the miner’s performance in real-time. Look for metrics like hashrate, temperature, and uptime to identify any potential issues early.
Regular Cleaning
Dust and debris can accumulate inside the miner, affecting its cooling efficiency. Clean the unit regularly using compressed air to maintain optimal airflow.
Firmware Updates
Stay updated with the latest firmware releases from the manufacturer. These updates often include performance improvements and bug fixes.
Troubleshooting
If you encounter issues such as overheating or reduced hashrate, refer to the user manual or contact customer support for assistance. The KS6 Pro+ comes with a 180-day warranty, ensuring reliable support for repairs.
Product Advantages of the KS6 Pro+
Installing the Dragonball Miner KS6 Pro+ offers several advantages for mining operators:
- High Hashrate: The 11 TH/s hashrate ensures maximum mining output, giving you a competitive edge in the market.
- Energy Efficiency: With a power efficiency ratio of 0.308 J/G, the KS6 Pro+ minimizes energy costs, enhancing your ROI.
- Reliability: The advanced thermal management system and robust build quality ensure consistent performance even in demanding environments.
- Versatility: Its support for kHeavyHash and KAS-Kaspa algorithms makes it suitable for diverse mining strategies.
- Compact Design: The space-efficient form factor allows you to deploy more units within your farm, maximizing productivity.
Conclusion
The Dragonball Miner KS6 Pro+ is a game-changer for cryptocurrency mining operations, offering exceptional performance, efficiency, and reliability. By following this installation guide, you can ensure that your KS6 Pro+ is set up correctly and operating at its full potential. Proper preparation, installation, and maintenance will not only maximize your mining output but also extend the lifespan of your equipment, delivering long-term value for your investment. Whether you’re scaling up an existing mining farm or starting a new operation, the KS6 Pro+ is a powerful tool that can help you achieve your goals in the competitive world of cryptocurrency mining.